Posts

Fundraising!

Image
  The Whittlesey Sports Association hosts a great event called the Big Bash. Its hosted on a sports field with a canal at the back.....  We take Tiny along and drop in the suction hose into the canal and raise money for the Firefighters charity.  www.firefighterscharity.org.uk   We set up a football goal with targets and use the first aid hoses for the kids to have a squirt.  Then on the way home we had a proper squirt! 

Oil Leaks - Fixed (Mostly)

Image
I waged war on oil leaks. Armed with some nice thick gasket paper from my father in law (Thanks Eric) a tube of Black Gasket Maker by Wynns (Great stuff) and new oil I replaced the gaskets and oil seals on the axles, transfer box, sump and rocker cover. Anglia Bearing Company were great and had in stock the correct replacement sizes that I needed.  Transmission products supplier | Anglia Bearing Company Ltd (anglia-bearing.co.uk) The original leather oil seals had served their time and were very dry and tired.  I only have the gear box to do now which I will try and do in situ, but the rest of the underneath is now oil leak free.  The transfer box has the main drive for the speedometer which included a plastic worm gear. This had started to deteriorate and I got a replacement.

Clutch stuck...

Image
  First run of the season started with a stuck clutch! Mum bus to the rescue! - Short sharp tug, bit of wheel spin, a big bang and she was free!  First job was to replace the sight glass, this lets you see how much water is in the tank and was a piece of copper pipe. I pinched one of the kids beads (That floats) in a nice day-glow orange as the marker and replaced the copper pipe with a plastic pipe.   

Heat Exchanger

Image
  We have been doing a bit of pumping with Tiny which is a great deal of fun, but have only been able to do it for short time periods.  There is a divert from the pump which provides cooling direct to the oil via a heat exchanger in the sump and a heat exchanger under the radiator. This provides cooling when no air is passing through the radiator when stationary.  The previous owner had just bypassed that divert and filled the pipes with antifreeze as the radiator was leaking into the heat exchanger.  A new found passion for pumping provided the impetus to fix it. Getting it off was the first challenge, very heavy and there were a load of other bits built around it.  With it finally off, the strip began, only broke two of the studs which were 'resistive' after being done up for the past 68 years!  The inside looked like a steam engine with rows of copper pipes, I had expected to see a lot of rot, but they were in surprisingly good condition. A bit of a hose...

First official outing!

Image
 Tiny went to her first show last weekend, The Whittlesea Big Bash. We had the pleasure of escorting a VIP for the day and being part of a collection of over 100 classics on the day. Some highlights below.  Spitfire lining up using my ladder! Pictures below,   

Whistle - Bang - Tighten - Shows

Image
Got a few Classic shows coming up I am hoping to make over the next few weeks if the weather holds up. Doing a bit of a shakedown, Tiny has been sat for a while over the summer waiting for some shows to actually happen!  Took Tiny for a test run yesterday and when hot the past few times I have taken her out she has been misfiring and just generally being a bit of a pain.  Also when first starting there is sometimes a BANG and the final section of exhaust hangs off.  I have a manifold vacuum leak which is causing a bit of a whistle when idling and is a job I have not got round to properly having a look at. I think it has been leaning the mixture off a tad as she has felt more gutless than usual which might be causing the troubles. I had a bit of a poke this evening and two of the manifold nuts on the intake were a bit slack - went through each of them and gave them a pinch up some 1/2 a turn!  I also tightened the carb body down and swapped out a fibre spacer which lo...

Pipe Length indicator- Phwoar

Image
  I have found a pipe length indicator.  In the video here:  AFS Column Pumping it shows the use. Its a really sensitive altimeter and as you go up or down hill in a relay it shows how many length of hose you should have between Goddesses.  Uphill fewer lengths, downhill more as gravity assists. It is such a well made bit of kit that is so specific to the AFS I am really pleased with it. It was carried in the Land Rover and is not Goddess issued kit, but it is still something that helps tell the story.  

Wheels Painted

Image
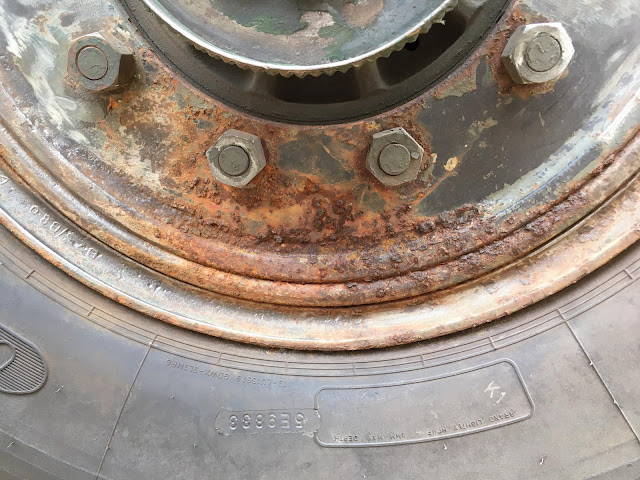
  The new wheels were in a bit of a state so I got them painted, Deep Bronze Green proper Green Goddess colours. Noticed a oil leak on the drivers side hub which needs fixing. But they have come up lovely. 

Engine Cowl

Image
During lockdown I had been catching up on various bits and pieces, one bit which had been hanging around the garage was the engine cowl, I have tried to paint it three or four times, brush, rollers and a botched spray job.  I took a deep breath and got prepared properly and it came out very well. Lots of sanding, flatting back between each coat and just a little touch of thinners to put it through the gun, maybe 3% maximum. Now I have the MO nailed I can start work on the floor in the cab while its warm. 

New Tyres!

Image
  Early in 2021 the legislation changed on tyres on large vehicles and they needed to be less than ten years old, or on historic vehicles be able to pass inspection.  The tyres which were on Tiny unfortunately were in pretty rough shape in places so I elected to switch them off.  Bar grip tyres were only available second hand from brakers yards and did not fill me with confidence. After some research I found a stock of a slightly larger tyre Goodyear G388's with wheels fitted that are a direct bolt on replacement. They are off old army trucks and were the spare wheels, while the wheels themselves are a little ropey, the tyres themselves have not seen a road, still got the mould marks on! 

Practicing spraying and have caught the bug, no, not that one.....

Image
Practiced spraying today on the underneath of the engine cowl. I used 10% thinners and hammerite and achieved not too bad a result. The cleaning afterward was as painful as i remember however. Also had a shoddy surround on the dials which turned out to be a solid chunk of metal that can be polished to an acceptable finish. Got the restoration bug now.... well and proper...