Posts

First official outing!

Image
 Tiny went to her first show last weekend, The Whittlesea Big Bash. We had the pleasure of escorting a VIP for the day and being part of a collection of over 100 classics on the day. Some highlights below.  Spitfire lining up using my ladder! Pictures below,   

Whistle - Bang - Tighten - Shows

Image
Got a few Classic shows coming up I am hoping to make over the next few weeks if the weather holds up. Doing a bit of a shakedown, Tiny has been sat for a while over the summer waiting for some shows to actually happen!  Took Tiny for a test run yesterday and when hot the past few times I have taken her out she has been misfiring and just generally being a bit of a pain.  Also when first starting there is sometimes a BANG and the final section of exhaust hangs off.  I have a manifold vacuum leak which is causing a bit of a whistle when idling and is a job I have not got round to properly having a look at. I think it has been leaning the mixture off a tad as she has felt more gutless than usual which might be causing the troubles. I had a bit of a poke this evening and two of the manifold nuts on the intake were a bit slack - went through each of them and gave them a pinch up some 1/2 a turn!  I also tightened the carb body down and swapped out a fibre spacer which lo...

Pipe Length indicator- Phwoar

Image
  I have found a pipe length indicator.  In the video here:  AFS Column Pumping it shows the use. Its a really sensitive altimeter and as you go up or down hill in a relay it shows how many length of hose you should have between Goddesses.  Uphill fewer lengths, downhill more as gravity assists. It is such a well made bit of kit that is so specific to the AFS I am really pleased with it. It was carried in the Land Rover and is not Goddess issued kit, but it is still something that helps tell the story.  

Wheels Painted

Image
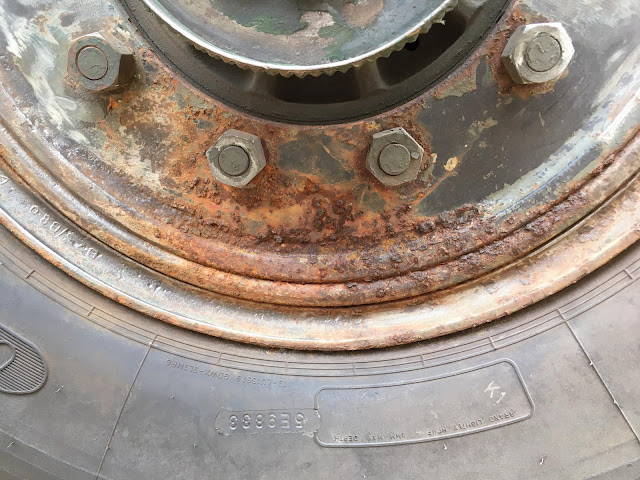
  The new wheels were in a bit of a state so I got them painted, Deep Bronze Green proper Green Goddess colours. Noticed a oil leak on the drivers side hub which needs fixing. But they have come up lovely. 

Engine Cowl

Image
During lockdown I had been catching up on various bits and pieces, one bit which had been hanging around the garage was the engine cowl, I have tried to paint it three or four times, brush, rollers and a botched spray job.  I took a deep breath and got prepared properly and it came out very well. Lots of sanding, flatting back between each coat and just a little touch of thinners to put it through the gun, maybe 3% maximum. Now I have the MO nailed I can start work on the floor in the cab while its warm. 

New Tyres!

Image
  Early in 2021 the legislation changed on tyres on large vehicles and they needed to be less than ten years old, or on historic vehicles be able to pass inspection.  The tyres which were on Tiny unfortunately were in pretty rough shape in places so I elected to switch them off.  Bar grip tyres were only available second hand from brakers yards and did not fill me with confidence. After some research I found a stock of a slightly larger tyre Goodyear G388's with wheels fitted that are a direct bolt on replacement. They are off old army trucks and were the spare wheels, while the wheels themselves are a little ropey, the tyres themselves have not seen a road, still got the mould marks on! 

Practicing spraying and have caught the bug, no, not that one.....

Image
Practiced spraying today on the underneath of the engine cowl. I used 10% thinners and hammerite and achieved not too bad a result. The cleaning afterward was as painful as i remember however. Also had a shoddy surround on the dials which turned out to be a solid chunk of metal that can be polished to an acceptable finish. Got the restoration bug now.... well and proper...

Discoveries!

Image
Found a few plates in the passenger footwell, which had been over painted, bit of scrubbing and they are an ID plate and a lubricant list. I have removed them for a good clean to put back on. No mean feat with the paint overlay!  It feels like I should have already known this however, I discovered a lever under each foot well, gave it a tug - there was a big crack! and I saw daylight and a hole appeared in the bonnet! Air-con 50's style! Full of surprises this project, none of them nasty so far!

Further Cab Stripping - Nearly there for paint!

Image
The floor was in a bit of a state aesthetically, not anywhere near good enough to paint over so am stripping back to metal, two coats of a good high build primer then spray over the colour coat. Have got the colour codes and a good quality coach enamel in semi gloss for the floor and satin for the roof.  It is really satisfying to strip back paint to sound metal in really good condition no rust discovered at all! (My other project - MG Midget was an utter rot box Link on the left <<<)  I also took out the dial surround so it can be painted easily with it having two colours.  Floor stripped - ready for undercoat with a little tidy up.  Went through one wire wheel quick quickly and after a socially distant compliant trip to Screwfix stocks were replenished.  Dials out -  Not a mean feat - it certainly looks like 65 year old wiring - and can't make out the colours of the wires so lots of labels before removing the dials. At least my colourblindness is...

2nd Coat!

Image
Very even cover and colour now, was a bit disapointed with the way the first coat had dried, however following a second coat this evening is looking much better. Ordered more paint today for roof and brown for the floor, hopefully arrive before the weekend! Got the bug now.....

First Paint!

Image
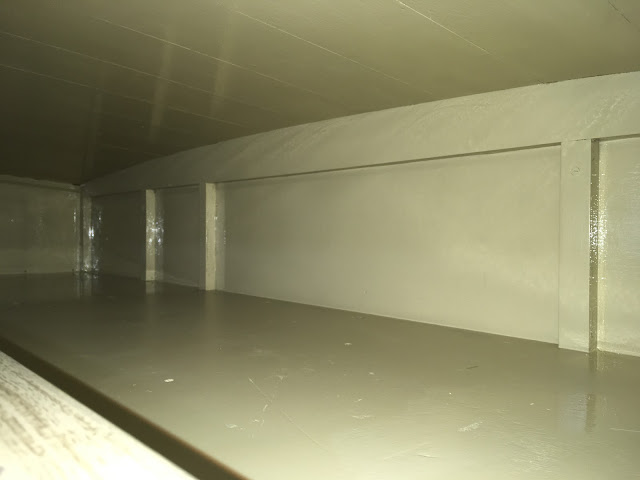
We decided to stay in again today (! lockdown!) more sanding with the first paint going on which was a bit of a milestone..... The storage shelf at the back of the cab is far and away the most awkward so I thought I would begin there! It didn't disappoint! The paint is a pleasure to work with, really thick and covers really well. only put a thin coat on and will do another coat tomorrow.So you can see some bits that didn't cover well. The paint I picked was BS381C 384 Light Straw which is an enamel paint, following some research, long drying times of 16 hours but is very forgiving,no unsightly brush marks to speak of. The below shows it sanded mostly but needs wiping/hoover before the first coat. First coat almost complete that shows the contrast!

Sanding! and figured out why the engine cowl had been getting super hot....

Image
Started sanding the inside today, lots of fiddly corners so I drafted in some help.... Also took the engine covers off which is double skinned. This is to provide air cooling across the engine in normal running. I was pretty sure that it wasn't working, I found a mouse house in the engine pipe! Something had made itself very much at home in the pipe! Hopefully no other nibbling of wires!

Prepping inside for painting!

Image
Being in lock down means that we aren't going to be going out much this year in Tiny, all of the shows have cancelled and I can't actually justify an 'essential journey' in her.  I have stripped the cab back so I can start painting the cab - all the seats are out and everything is cleaned down ready for sanding. The seats were a proper pain - no captive nuts and four different bolt lengths and sizes and only one of me to do it!  A bit of research on the paint from some friendly forums presented the paint codes:  Bs381c 369     Biscuit,          Inside the lockers Bs381c 384     Light straw,    cab upper panels Bs381c 412     Dark brown,   cab lower panels Its a coach enamel paint which can be brushed onto a primed surface so have ordered some primer and 'Light Straw' for the upper part of the cab. I want to see what finish I get with a brush - it has a 'long...